FastX3 is now the primary version of FastX used on Engineering systems that support FastX including login.engineering.uiowa.edu. As we progress though the summer, more system will be added to utilize FastX3 as the primary and FastX2 will be removed from these systems. If you have an issue with using FastX2 on a system, please try connecting via FastX3 before contacting Engineering Computer Services.
FastX 3
What is it and where to download
FastX3 is a utility that allows for graphical remote access to our Linux systems. Clients are available for Windows, Mac, Linux, and web (download and configuration instructions listed below).
For connections to standard engineering Linux systems, use login.engineering.uiowa.edu.
For connections to GPU computing currently you must use FastX3 (available below), FastX3 is not available. If you are taking a specific class that needs FastX3 your instructor will tell you a specific system to connect to, not login-gpu.engineering.uiowa.edu pool.
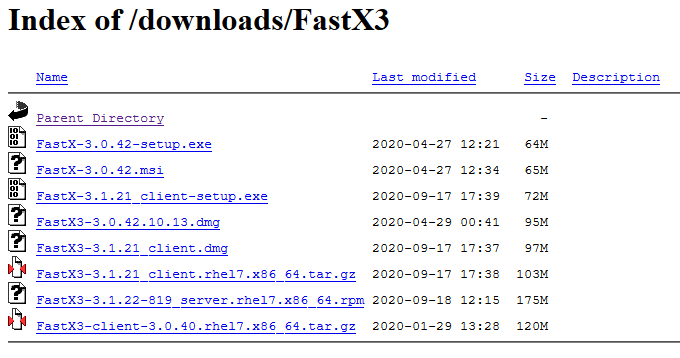
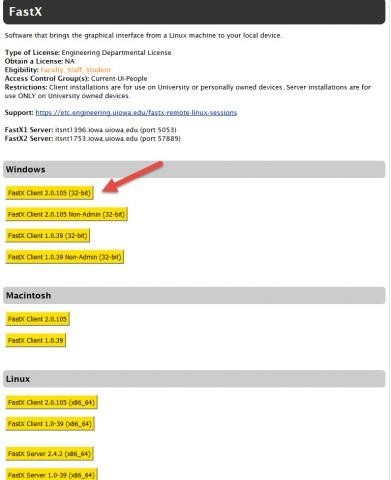
FastX3 is available for download on the ECS download page. Download the needed file and follow directions below for specific system type.
Windows Installation Instructions
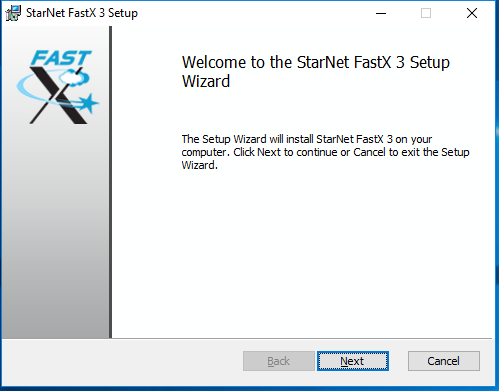
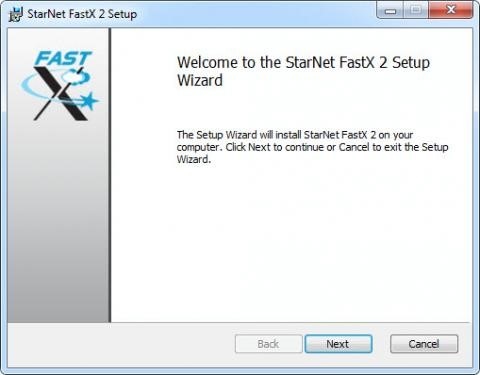
After you have downloaded the Windows version, start the setup wizard. To proceed you have to accept the End-User License Agreement. By default FastX3 wants to install in the Program Files directory on the C:\ drive. You can change the installation directory or accept the default. The installer tells you that it is ready to install FastX3; you need to click the Install button. When the installation is complete, click the Finish button to exit the setup wizard.
Configuration is below in the How to configure and use FastX 3 section.
Macintosh Installation Instructions
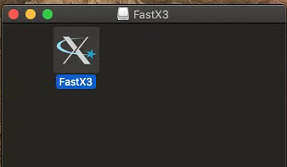
Once you have downloaded the dmg file from the download site above in the instructions. Open the downloaded dmg and drag and drop the FastX3 icon into the application folder.
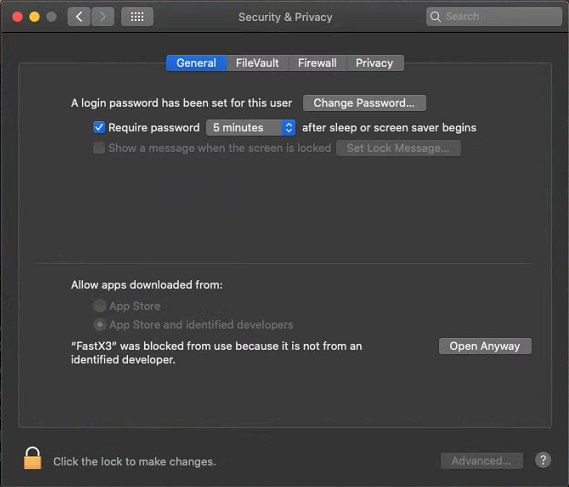
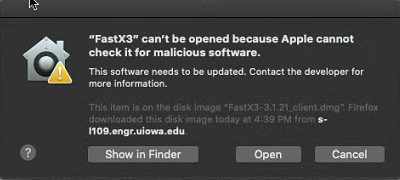
When you run the FastX3 for the first time you will get the following error. Don't worry this is expected.

To fix it, open up System Preferences - click on the Security & Privacy - select General tab - on the lower part of the screen click the Open Anyway button
A message will pop up asking like below. Click on Open
Configuration is below in the How to configure and use FastX 3 section.
Linux Installation Instructions
Terminal:
Open a terminal window and run the command tar xvfp FastX<tab>, as illustrated. Linux is case sensitive, so enter this command as shown. The [tab] after entering FastX finds files that match "FastX", so if you have more than one file with FastX, you will need to select the correct file. Then execute the FastX file via the command FastX/FastX. FastX will then open to the connection management page.
Gui:
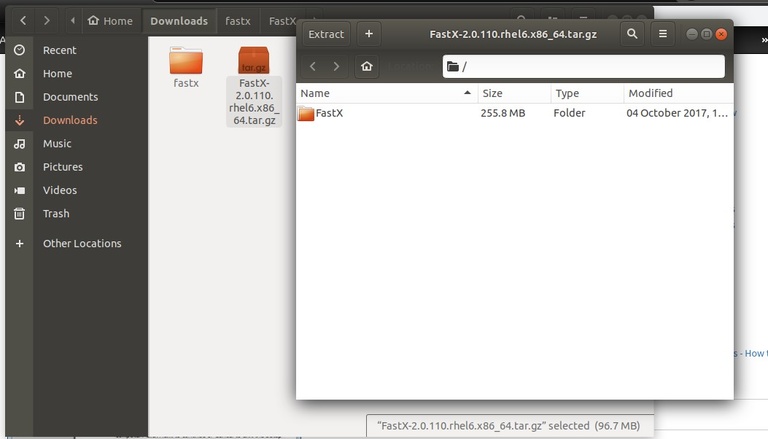
Double click on the downloaded archive.
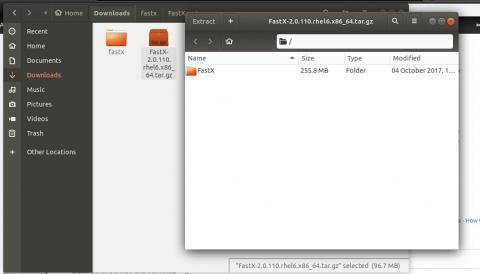
Drag and drop the folder within the archive to somewhere else to extract it. Once the files are extracted simply double click the FastX file to launch the program.
Configuration is below in the How to configure and use FastX 3 section.
How to configure and use FastX 3
Once FastX is launched, it is completely identical between Linux, Windows, and Mac
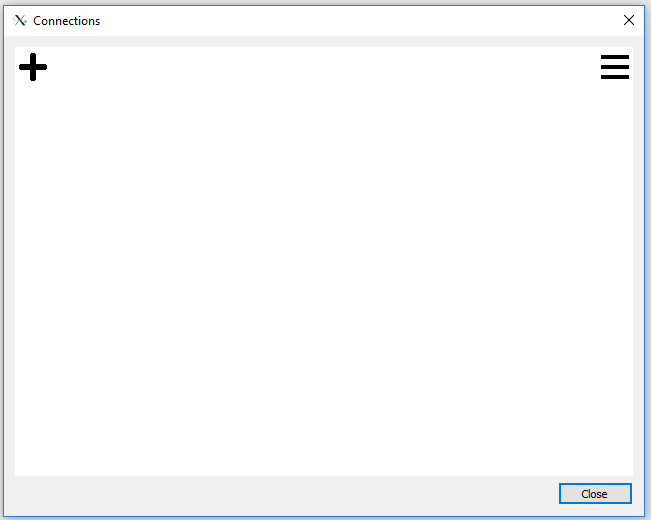
Connection Manager
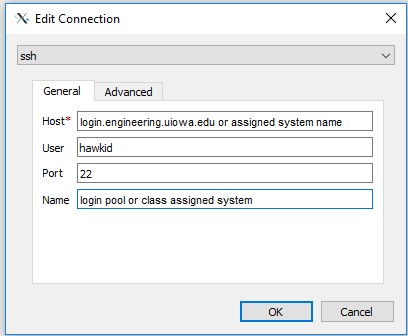
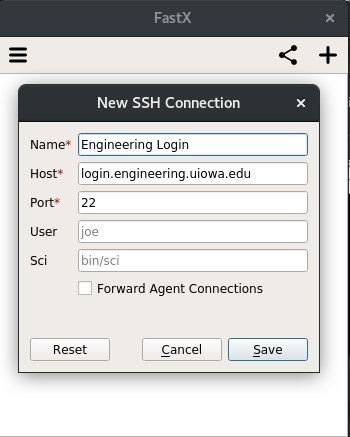
Now that the client is on your local machine and you are at the connection manager window. Go ahead and click the plus sign in the top right, and select SSH. Below is an example on how to setup the SSH connection.
For the Hostname, select the desired host pool.
- For connections to standard Linux systems, use login.engineering.uiowa.edu.
- For connections to class assigned GPU computing systems, use the system assigned by your professor.
- For connections to other GPU computing systems, use login-gpu.engineering.uiowa.edu.
Once that is filled out, click save. See at the bottom of this section under Additional Information for what is available on these systems.
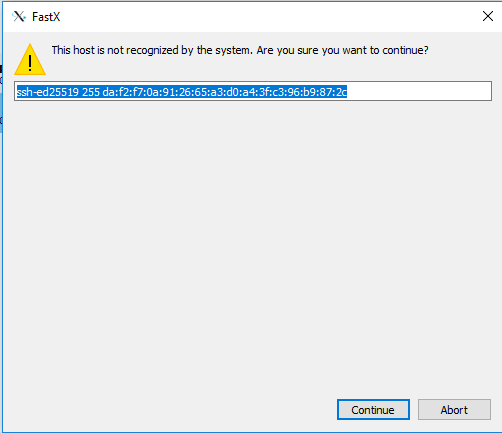
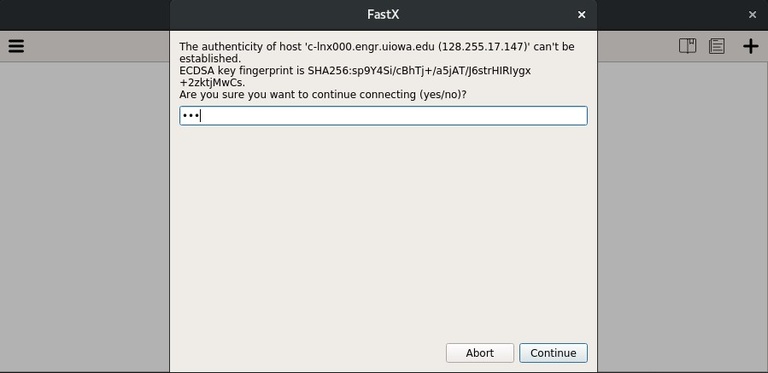
Since this is your first time connecting, you will have to accept the unique fingerprint of the machine you are connecting to. Type yes to continue on this page.
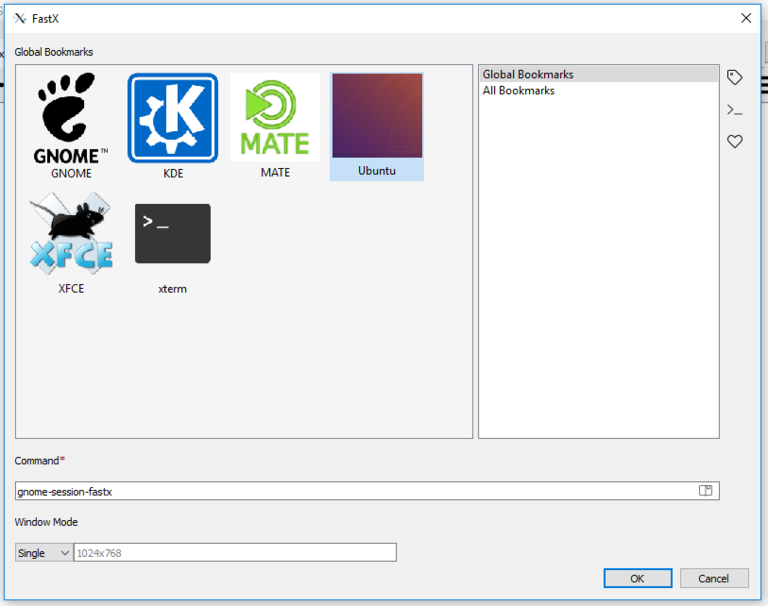
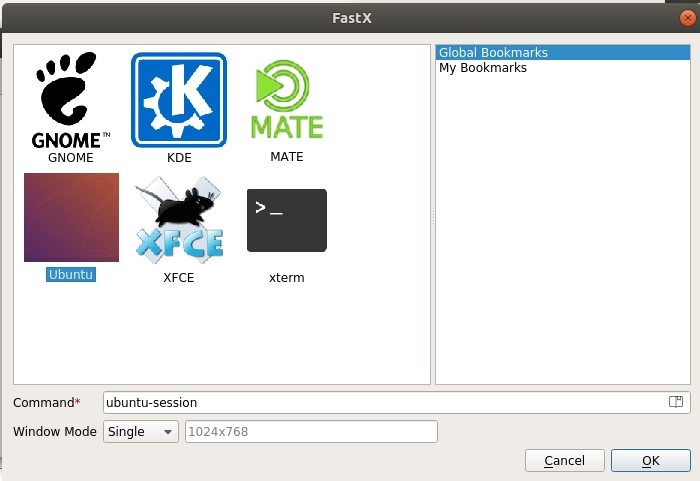
After that you will be presented another management window. Click the plus button in the top right to add a connection. You will then be prompted to choose a desktop environment.
Connecting via Web-Browser
Using the correct special URL you can run a FastX session in your web-browser, you do not need to install any special software. The URL is of the form: https://system.name:3300 For example: https://l-lnx129.engr.uiowa.edu:3300 (the current ECS-supported GPU systems are: <system list needed>).
Help
If you need help installing FastX, talk to the consultant at the Engineering Help Desk, 1256 SC, 319-335-5055.
Additional Information
The login.gpu.engineering.uiowa.edu systems are setup with Cuda, Anaconda3, and contain modules identical to the Deep Learning Lab (SC 4622). For more details on what modules are loaded, please reference the system you are logged into with module commands. For a primer on module commands, pleaser refer to the ITS HPC Wiki site on Environment Modules.
FastX 2
What it is and where to download
FastX2 is a utility that allows for remote access cross-platform. Thus it can be run as a client or server on Windows, Linux, and Mac. Computers can be accessed via the installed FastX2 client, or by accessing the requested computer via https://system.name:3443.
To download the FastX2 client, visit the ITS software download page (https://helpdesk.its.uiowa.edu/software/download/fastx/default.htm).
The client is currently installed in the labs (via AppsAnywhere)
Windows Installation Instructions
After you have downloaded the Windows version, start the setup wizard. To proceed you have to accept the End-User License Agreement. By default FastX2 wants to install in the Program Files directory on the C:\ drive. You can change the installation directory or accept the default. The installer tells you that it is ready to install FastX2; you need to click the Install button. When the installation is complete, click the Finish button to exit the setup wizard.
Configuration is below in the How to configure and use FastX 2 section.
Linux Installation Instructions
Terminal
Open a terminal window and run the command tar xvvfp FastX<tab>, as illustrated. Linux is case sensitive, so enter this command as shown. The [tab] after entering FastX finds files that match "FastX", so if you have more than one file with FastX, you will need to select the correct file. Then execute the FastX file via the command FastX/FastX. FastX will then open to the connection management page.
Gui
Double click on the downloaded archive.
Drag and drop the folder within the archive to somewhere else to extract it. Once the files are extracted simply double click the FastX file to launch the program.
Once FastX is launched, it is completely identical between Linux, Windows, and Mac.
Configuration is below in the How to configure and use FastX 2 section.
How to configure and use FastX 2

Connection Manager
Now that the client is on your local machine and you are at the connection manager window. Go ahead and click the plus sign in the top right, and select SSH. Below is an example on how to setup the SSH connection. For the Hostname, make sure to use login.engineering.uiowa.edu. Once that is filled out, click save. Alternatively for GPU computing, use login-gpu.engineering.uiowa.edu
Since this is your first time connecting, you will have to accept the unique fingerprint of the machine you are connecting to. Type yes to continue on this page.
After that you will be presented another management window. Click the plus button in the top right to add a connection. You will then be prompted to choose a desktop environment.
Connecting via Web-Browser
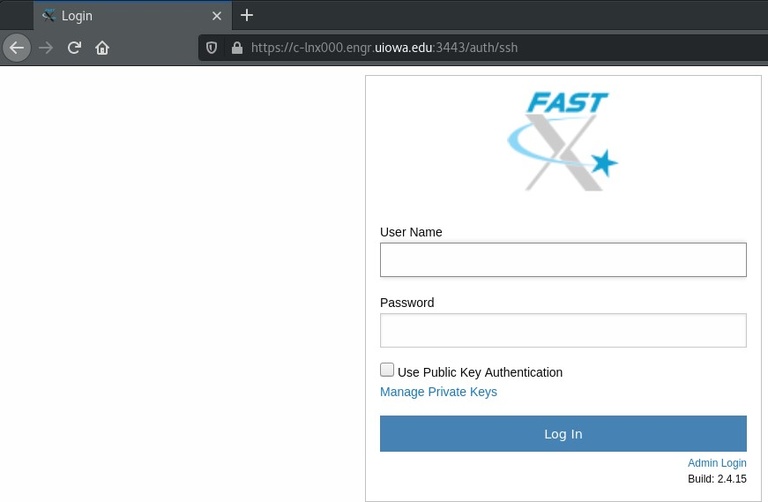
Using the correct special URL you can run a FastX session in your web-browser, you do not need to install any special software. The URL is of the form: https://c-lnx001.engr.uiowa.edu:3443 (the current ETC supported systems are: c-lnx000.engr.uiowa.edu c-lnx001.engr.uiowa.edu c-lnx002.engr.uiowa.edu c-lnx003.engr.uiowa.edu c-lnx004.engr.uiowa.edu c-lnx005.engr.uiowa.edu c-lnx006.engr.uiowa.edu).
Help
If you need help installing FastX, talk to the consultant at the Engineering Help Desk, 1256 SC, 319-335-5055.
Additional Information
Read the Usage Information on the Abaqus page if you are using FastX to run Abaqus.
FastX has replaced NX NoMachine.